A featured collection in Shopify helps you highlight specific products on your store’s homepage or any page of your choice. It is a perfect way to showcase bestsellers, seasonal items, or promotional products and grab customer attention instantly.
This blog is a walkthrough of how to add a featured collection on Shopify using various methods.
Let’s dive in.
Different Ways to Add Featured Collections in Shopify
Here I am mentioning three different methods to add a features collection to your Shopify store.
- Using the built-in theme editor – The Shopify Dawn theme offers a simple pre-built theme with basic functionality to add a features collection section, but you don’t get many customization options.
- Via adding Liquid code – You can manually create a featured collection and position it anywhere on your Shopify store by adding custom code to the Liquid file. This method demands advanced coding expertise and is time-consuming.
- Opt for a Shopify section app – This approach gives you access to pre-built free and paid sections that go beyond what a standard theme offers.
Using the app, you will save tons of time and effort, and ultimately, you will be able to focus on growing your Shopify store.
Let’s see the steps for each method.
Using Shopify Built-in Theme Editor (Dawn Theme)
The following are the steps to add a feature collection using Shopify’s built-in feature.
Step 1: Head to Theme Editor
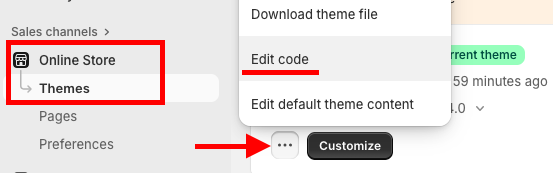
Navigate to your Shopify admin panel, then go to Online store > Theme and click Customize to add a section.
Step 2: Add and Customize Featured Collection Section
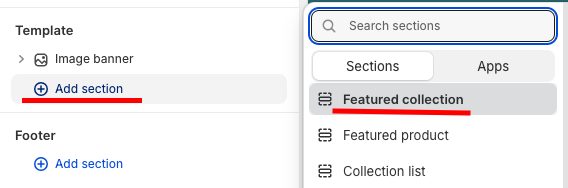
Now, from the theme editor, under Templates, click Add Section and select Featured Collection.
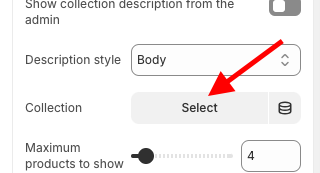
In the right sidebar of the theme editor, scroll down to Collection and click Select to add a collection. You can also make other changes from there; it offers basic ones.
Step 3: Save the Changes
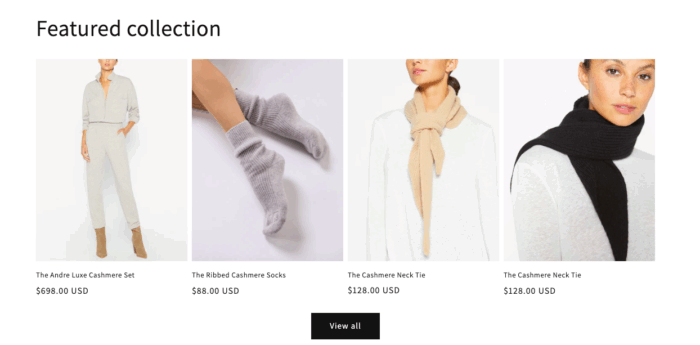
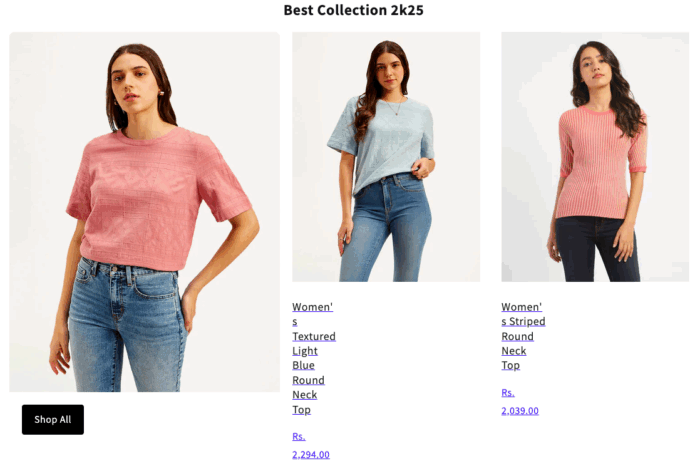
Once you finish making the edits. Save them. And this is how simple it will look.
Steps to Display a Featured Collection Via Liquid Code
This is a three-step process, which is full of coding. Take extra care while adding these to your store.
Step 1: Access the Theme Code
From your Shopify admin panel > Online store > Theme > …(three dots) > Edit code
Step 2: Paste the Featured Collection Liquid Code
Then, from there, add a new section and name it as featured_collection.liquid. Paste the following code in the newly created featured collection section and Save it.
{% comment %}
  Section for displaying a featured collection with a hero product layout.
  This code is designed to be a standalone section file.
{% endcomment %}

{% style %}
.featured-collection-section {
  padding: 40px 0;
}

.section-header {
  margin-bottom: 20px;
  font-size: 24px;
  font-weight: bold;
  text-align: center;
}

.collection-grid {
  display: grid;
  gap: 20px;
  grid-template-columns: 1fr;
}

@media (min-width: 768px) {
  .collection-grid {
    grid-template-columns: 2fr 3fr;
    align-items: start;
  }
}
.hero-product-card {
  display: flex;
  flex-direction: column;
  height: 100%;
  border-radius: 8px;
  overflow: hidden;
}

.hero-product-image-wrapper {
  position: relative;
  width: 100%;
}

.hero-product-image {
  width: 100%;
  height: auto;
  display: block;
}

.hero-product-info {
  padding: 20px;
  text-align: left;
}

.hero-product-title {
  font-size: 18px;
  font-weight: bold;
  margin-bottom: 10px;
}

.hero-product-text {
  margin-bottom: 20px;
  color: #555;
}

.shop-all-button {
  display: inline-block;
  padding: 10px 20px;
  background-color: #000;
  color: #fff;
  text-decoration: none;
  border-radius: 4px;
  font-weight: 500;
  transition: background-color 0.2s ease-in-out;
}

.shop-all-button:hover {
  background-color: #333;
}

.product-grid {
  display: grid;
  gap: 20px;
  grid-template-columns: repeat(2, 1fr);
}

.product-card{% endstyle %}

<div class="featured-collection-section">
  <div class="page-width">
    {% assign featured_collection = collections[section.settings.featured_collection] %}

    {% if featured_collection and featured_collection.products.size > 0 %}
      <h2 class="section-header">{{ section.settings.title }}</h2>

      <div class="collection-grid">
        <!-- Hero Product -->
        <div class="hero-product-card">
          <a href="{{ featured_collection.products.first.url }}">
            <div class="hero-product-image-wrapper">
              {% assign hero_image_size = section.settings.hero_image_size %}
              <img
                src="{{ featured_collection.products.first.featured_media | img_url: hero_image_size }}"
                alt="{{ featured_collection.products.first.featured_media.alt }}"
                class="hero-product-image"
                loading="lazy"
              >
            </div>
          </a>

          <div class="hero-product-info">
            {% if section.settings.hero_text != blank %}
              <p class="hero-product-text">{{ section.settings.hero_text }}</p>
            {% endif %}
            <a href="{{ featured_collection.url }}" class="shop-all-button">
              {{ section.settings.shop_all_button_text }}
            </a>
          </div>
        </div>

        <!-- Product Grid -->
        <div class="product-grid">
          {% for product in featured_collection.products limit: section.settings.product_limit offset: 1 %}
            <div class="grid__item">
              <a href="{{ product.url | within: featured_collection }}">
                <div class="product-card">
                  <div class="product-card__image-container">
                    {% assign product_image_size = section.settings.product_image_size | append: 'x' %}
                    <img
                      src="{{ product.featured_media | img_url: product_image_size }}"
                      alt="{{ product.featured_media.alt }}"
                      class="product-card__image"
                      loading="lazy"
                    >
                  </div>
                  <div class="product-card__info">
                    {% if section.settings.show_product_title %}
                      <h3 class="product-card__title">{{ product.title }}</h3>
                    {% endif %}
                    {% if section.settings.show_product_price %}
                      <span class="product-card__price">{{ product.price | money }}</span>
                    {% endif %}
                  </div>
                </div>
              </a>
            </div>
          {% endfor %}
        </div>
      </div>
    {% else %}
      <p>No featured products found.</p>
    {% endif %}
  </div>
</div>

{% schema %}
{
  "name": "Featured Collection",
  "settings": [
    {
      "type": "text",
      "id": "title",
      "label": "Heading",
      "default": "Featured Products"
    },
    {
      "type": "collection",
      "id": "featured_collection",
      "label": "Collection"
    },
    {
      "type": "select",
      "id": "hero_image_size",
      "label": "Hero image size",
      "options": [
        { "value": "400x", "label": "Small" },
        { "value": "600x", "label": "Medium" },
        { "value": "800x", "label": "Large" }
      ],
      "default": "600x"
    },
    {
      "type": "textarea",
      "id": "hero_text",
      "label": "Hero product description",
      "default": "Let those ankles breathe."
    },
    {
      "type": "text",
      "id": "shop_all_button_text",
      "label": "Shop All button text",
      "default": "Shop All"
    },
    {
      "type": "range",
      "id": "product_limit",
      "min": 2,
      "max": 12,
      "step": 1,
      "label": "Number of products to show",
      "default": 4
    },
    {
      "type": "range",
      "id": "product_image_size",
      "min": 200,
      "max": 600,
      "step": 50,
      "label": "Product image size",
      "default": 600
    },
    {
      "type": "checkbox",
      "id": "show_product_title",
      "label": "Show product titles",
      "default": true
    },
    {
      "type": "checkbox",
      "id": "show_product_price",
      "label": "Show product prices",
      "default": true
    }
  ],
  "presets": [
    {
      "name": "Featured Collection (Hero)",
      "category": "Collection"
    }
  ]
}
{% endschema %}
Step 3: Add Collection in Theme Editor
After saving the file, head to the theme editor, Online store > Themes > Customize. Click the Add section and find the section we created.

Add the collection from the right-hand side, set up the changes you want to make, and save them again.
This is how it will look, still basic.
Add a Readymade Shopify Featured Collection Section
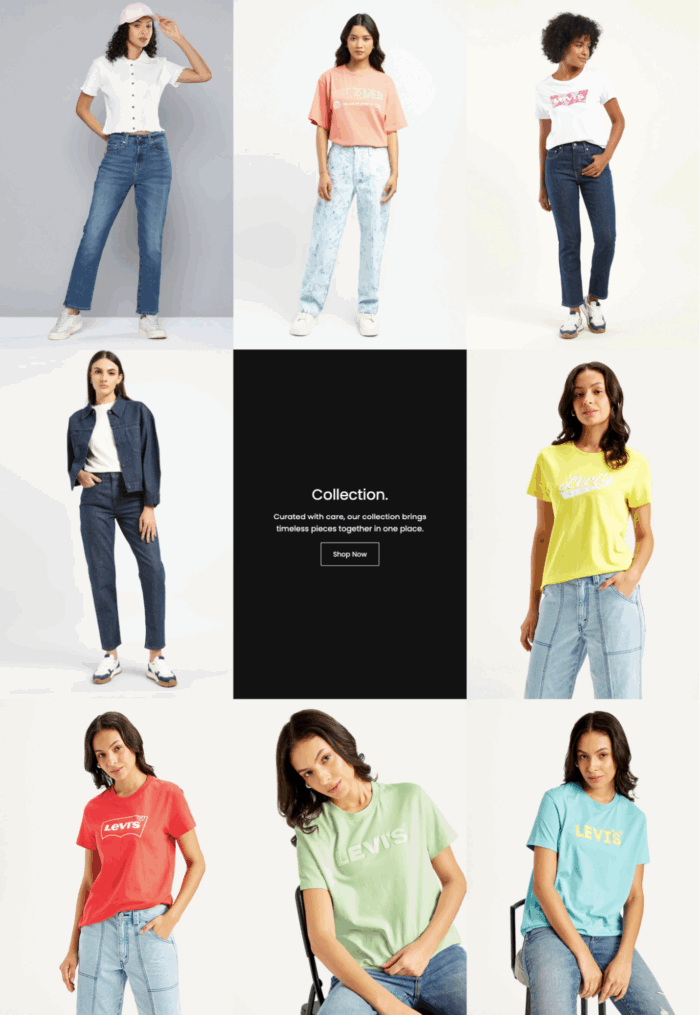
A well-organized featured collection section should be clean, visually appealing, and highlight products with clear images and prices.
It should look something like this.
To add this type of section right in your store, use the MIT Sections Pro app. This is super easy to use and has multiple options for the section you can choose from.
Let’s see how to do so.
Step 1: Install and Select a Section
Install the MIT Sections Pro app from the Shopify App Store. From the app dashboard, click the Browse section and search for the featured collection section.

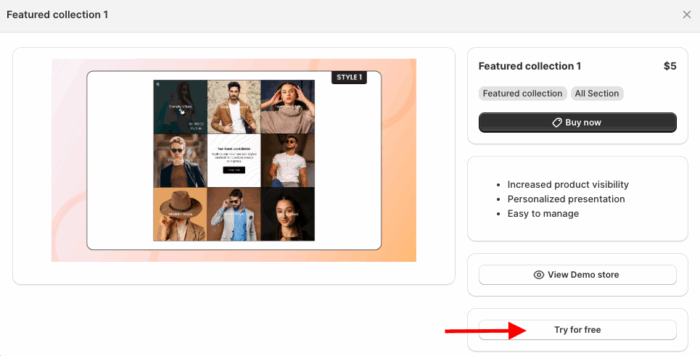
Select the one from here that you want to purchase. Here we’ll select the Featured collection 1.
Step 2: Click the Try for Free Button
After you select the section, click Try for Free to get a free trial before making the purchase.
While on the free trial, you’ll be directed to the MIT demo store. After purchasing the section, you can integrate it into your store’s theme.
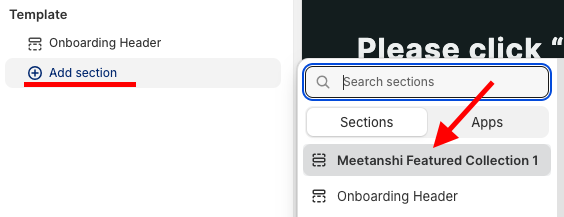
From here, click the Add section and select Meetanshi Featured Collection 1.
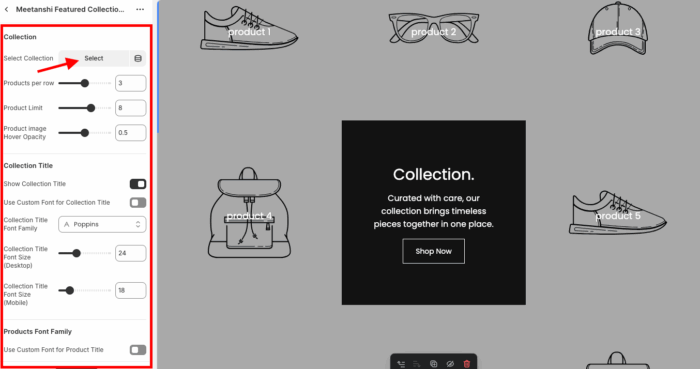
Step 3: Edit Featured Collection Section
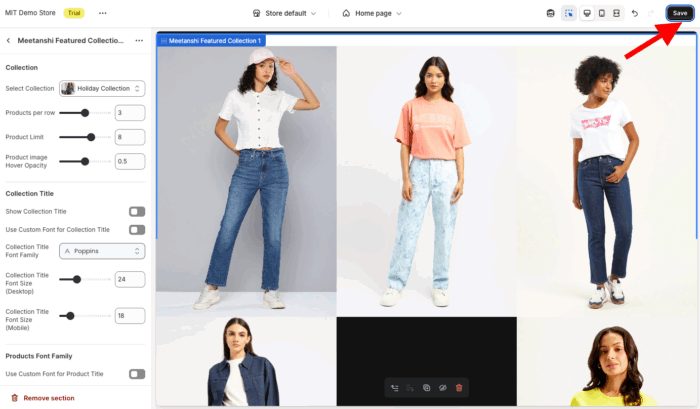
Add the collection from here. Additionally, you get more than 30 modification options to design and make this section yours.
And finally, Save the changes.
What Makes MIT Sections Pro Stand Out?
MIT Sections Pro isn’t just another Shopify app – it’s designed to give merchants complete freedom to design their store exactly how they want.
Along with the featured collection sections, it offers 130+ free and paid pre-built sections, and you can easily add newsletters, banners, testimonials, FAQs, and more without touching a single line of code.
- Comes up with 130+ pre-designed free and paid sections, accessible to all merchants
- 100% free installation with advanced customization features included
- Simple to edit, no coding required
- Fully optimized for fast loading and works with all Shopify themes
- Complete customization control, even with free templates
- Flexibility to add, edit, or replace sections as your store grows
- Cost-effective for businesses of any size, with a free trial available
Your all-in-one solution to create a professional Shopify store
Install App Now