Shopify checkouts are great, but not for everyone.
Some shoppers simply want to message, confirm, and buy. By adding an order on WhatsApp button in Shopify, you give shoppers a shortcut to connect with you in the fastest way.
In this post, I will share the process of how to add order on WhatsApp button in Shopify in a few minutes.
How to Collect Orders from WhatsApp?
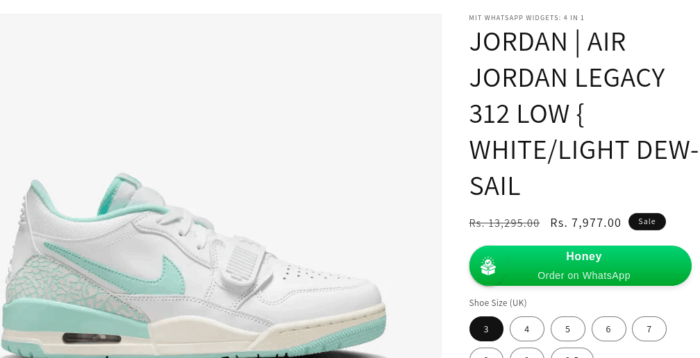
To start collecting orders in WhatsApp, you need to place a WhatsApp button prominently on the product page or cart page, like this:
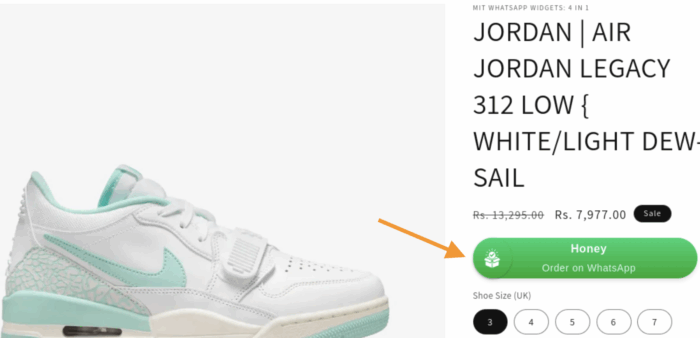
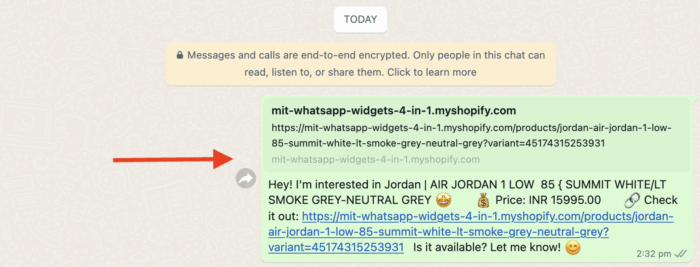
When the shopper clicks the button, they will be directed to the WhatsApp chat with a pre-written message. Then, you can continue the conversation from there and allow the shopper to place their order.
Here you will need to make some modifications in the backend for the process to work smoothly, like:
- Create a WhatsApp format template with pre-filled text
- Customize button text, color, icon style, and appearance position to match your website
- Use color labels such as “New order”, “Paid”, “Shipped” to keep the chat organized
Ways to Add a WhatsApp Order Button in Shopify
There are mainly two methods to add a WhatsApp order button to Shopify: Editing the Liquid theme code or using a WhatsApp widget
Edit the Liquid Theme Code
Here, you will have to edit the Shopify theme code with essential details, such as the WhatsApp number and other customization elements. You have access to the basic functionalities here; it is recommended only to use this method if you have technical knowledge.
Add a WhatsApp Order Widget
This is the code-free method to add a Shopify WhatsApp button. You just need to add a few settings to display the button on specific product pages. Additionally, you can modify various functionalities, including color, icon, text, font, and agent selection.
How to Add Order on WhatsApp Button in Shopify?
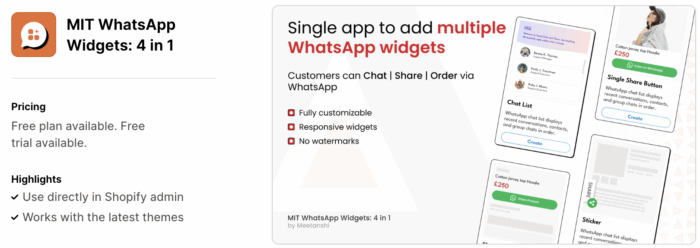
Here, we will add the WhatsApp Order Button using the MIT WhatsApp Widgets: 4 in 1 Shopify app.

Without any coding requirement, you can add the Order on WhatsApp widget and add customization that matches your branding. You can deactivate the button anytime with a simple toggle or keep it active as long as you want.
It also offers customization, like:
- Display Order on WhatsApp widget on specific product or collection pages
- Show the order button to specific customers in your store
- Enter URL to hide the button from the specific store page
Here are the 4 steps of Shopify WhatsApp integration using the app.
Step 1: Install & Activate the App
Head to the Shopify App Store and install the MIT WhatsApp Widgets: 4 in 1.
Now, head to the MIT WhatsApp Widgets: 4 in 1 and click Order on WA widget.
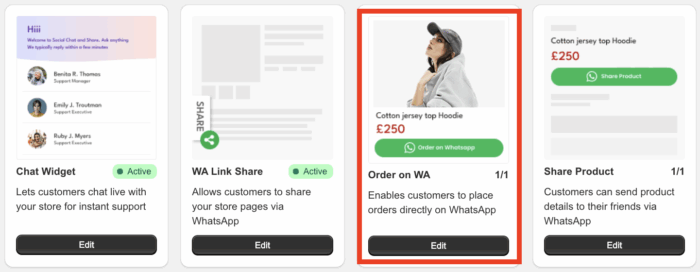
Then, click on create and change the status to Active for the widget.

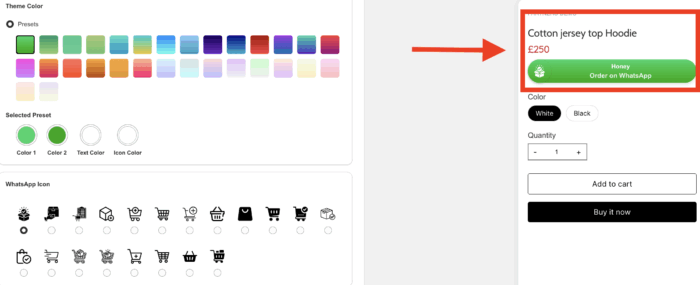
Step 2: Style the Order on WhatsApp Button
Now, add the Style Settings as you wish. Here you will have to:
- Set the title
- Add the theme color
- Select a WhatsApp icon
- Change the text font style
- Set the position of the button (Below Price, Below Name, or Custom position)
For all the setting changes you make, you can see the live preview on the right-hand side.
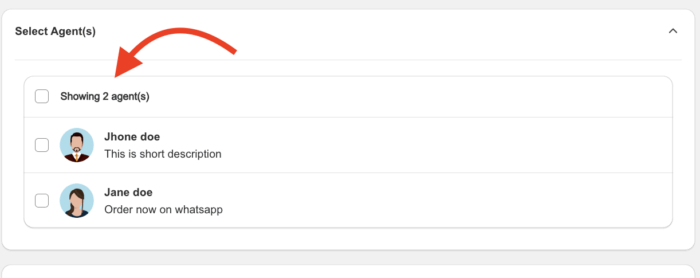
Step 3: Select Agent & Set Default Message
Then, in the Select Agent(s) section, choose the agent you want to show in the Order on WhatsApp widget.
If you don’t have an agent, you will need to create one first. Head to the Manage Agents in the app dashboard and click on Create.
Add the details and click Save.
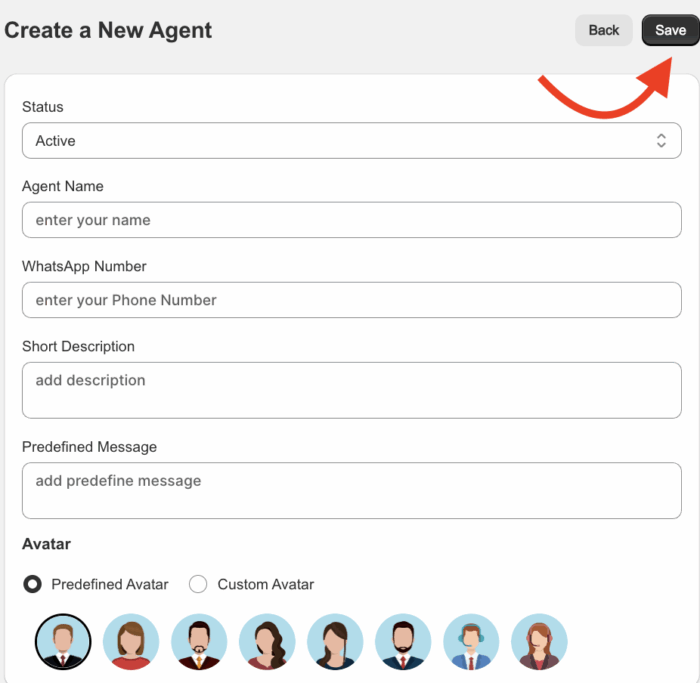
Based on the WhatsApp number you add here for the specific agents, and assign the agent, that particular agent will receive the order query on the added WhatsApp number.
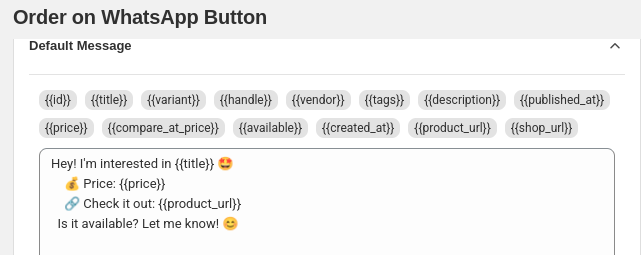
Now, add the Default Message settings, customize the WhatsApp message template to control how the message will appear when an order is placed.
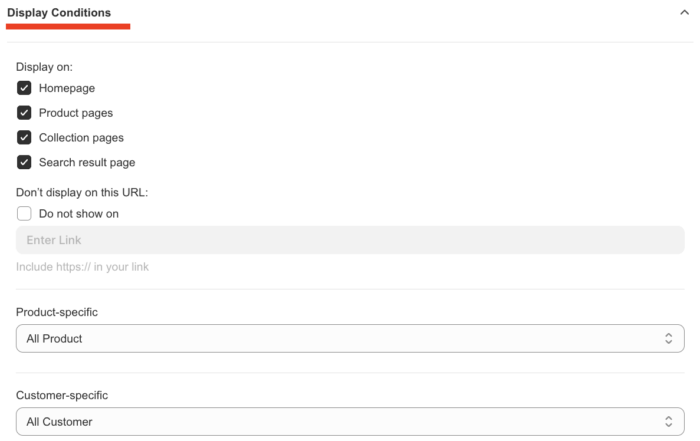
Step 4: Set Display Conditions
Here you can set the display conditions to determine where you want to show the button on your store.
Set rules for when and where the Order on WhatsApp widget should appear on your store
- Choose the specific pages where you want the widget to be shown
- Use the “Do Not Show On” option to exclude certain pages by entering their links
- Enable product-specific display to show the widget only on selected products
- Enable customer-specific display to target specific customer groups
And it’s done, the Shopify order on WhatsApp icon will be added to your store, and it will look like this.
After clicking the button, the shopper will be directed to WhatsApp, where they can set the pre-set message.
Start Collecting Orders on WhatsApp
Adding an order on WhatsApp button on Shopify is the easiest way to boost engagement and close more sales, especially with customers who prefer quick and direct communication.
With the MIT WhatsApp Widgets: 4 in 1 app, you can set up the button within a few clicks, from customizing design to pre-filled messages and agent selection, everything is built to help you convert chats into confirmed orders.