Your fonts help to shape your brand identity, so why settle for basic?
Regardless of your store style, adding a custom font to the Shopify theme elevates your aesthetic.
In this blog, learn how to add a font to a Shopify theme, be it for the Shopify Dawn theme or others.
Importance of Font Files in Shopify
Adding a font file to the Shopify theme is not just for better design, but it also:
- Improve readability and navigation, ultimately enhancing the shopping experience
- Personalize your store, making it different from your competitors
- Optimize load times, only including the weight and style you actually use
- Same typography throughout the store helps strengthen the brand identity
Download Various Shopify Fonts
You can find free and premium fonts compatible with Shopify from:
- Google Fonts (widely supported and easy to integrate)
- Adobe Fonts (if you have a subscription)
- FontSquirrel (for custom font files)
Make sure you choose .woff or .woff2 formats for best browser support and performance.
How to Add Custom Fonts to a Shopify theme?
To add a custom font to the Shopify theme, you have to follow these 3 steps:
First, select and prepare font files. Choose a web-friendly font (e.g., WOFF, WOFF2) from sources like Google Fonts, Font Squirrel, or Adobe Fonts. Load it in your theme and save it.
Step 1: Upload Font Files to Shopify
Select a font of your choice and then head to the Shopify admin > Content > Files.
Then, upload the font files (e.g., .woff, .woff2) via Upload Files
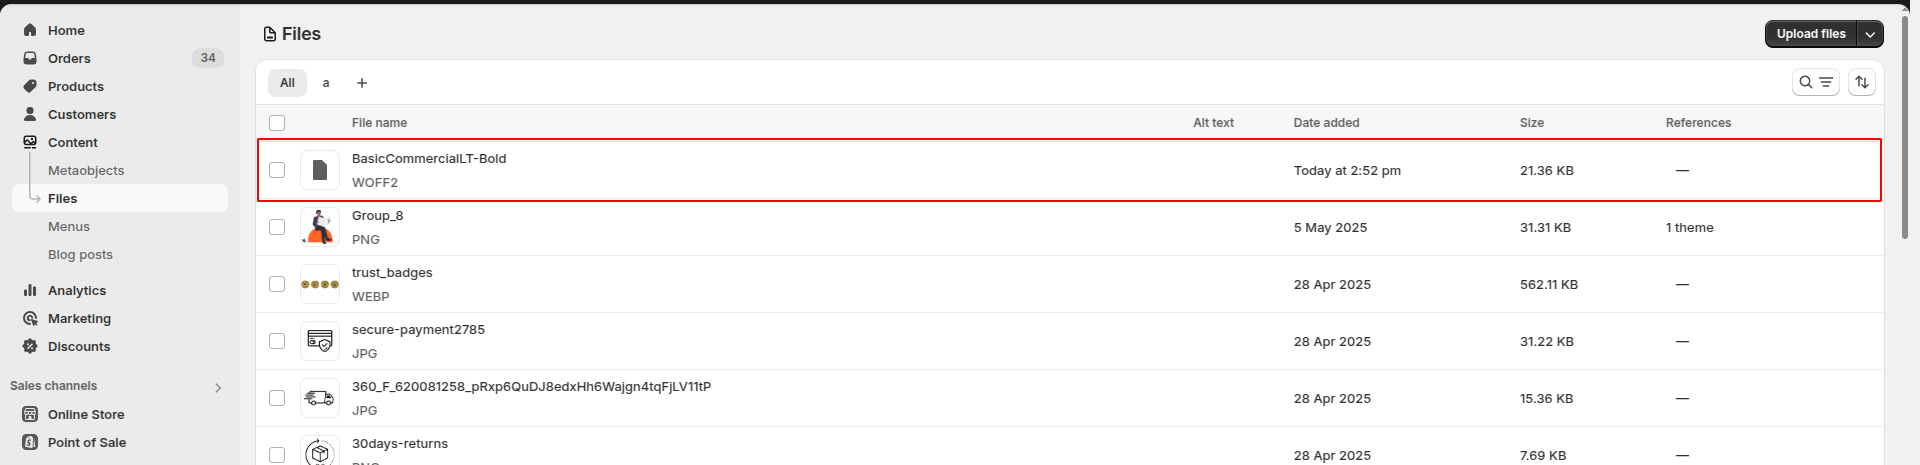
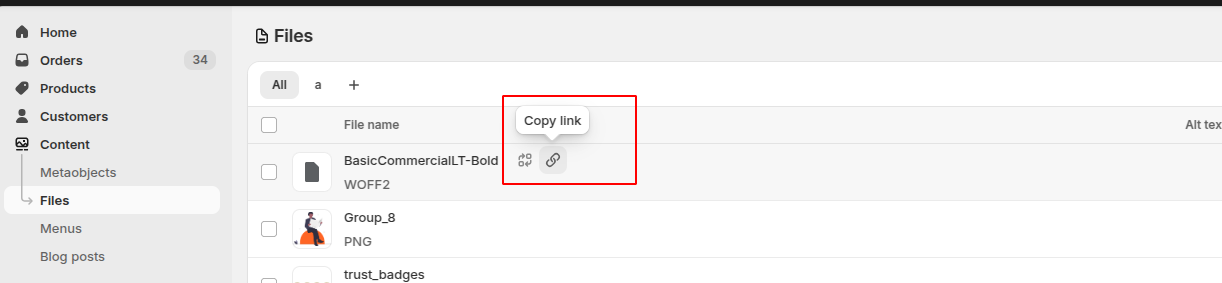
Copy the URL of each uploaded file for later use.
Step 2: Add Font-Face CSS
Now, go to Online Store > Themes > (…)Three dots > Edit code.
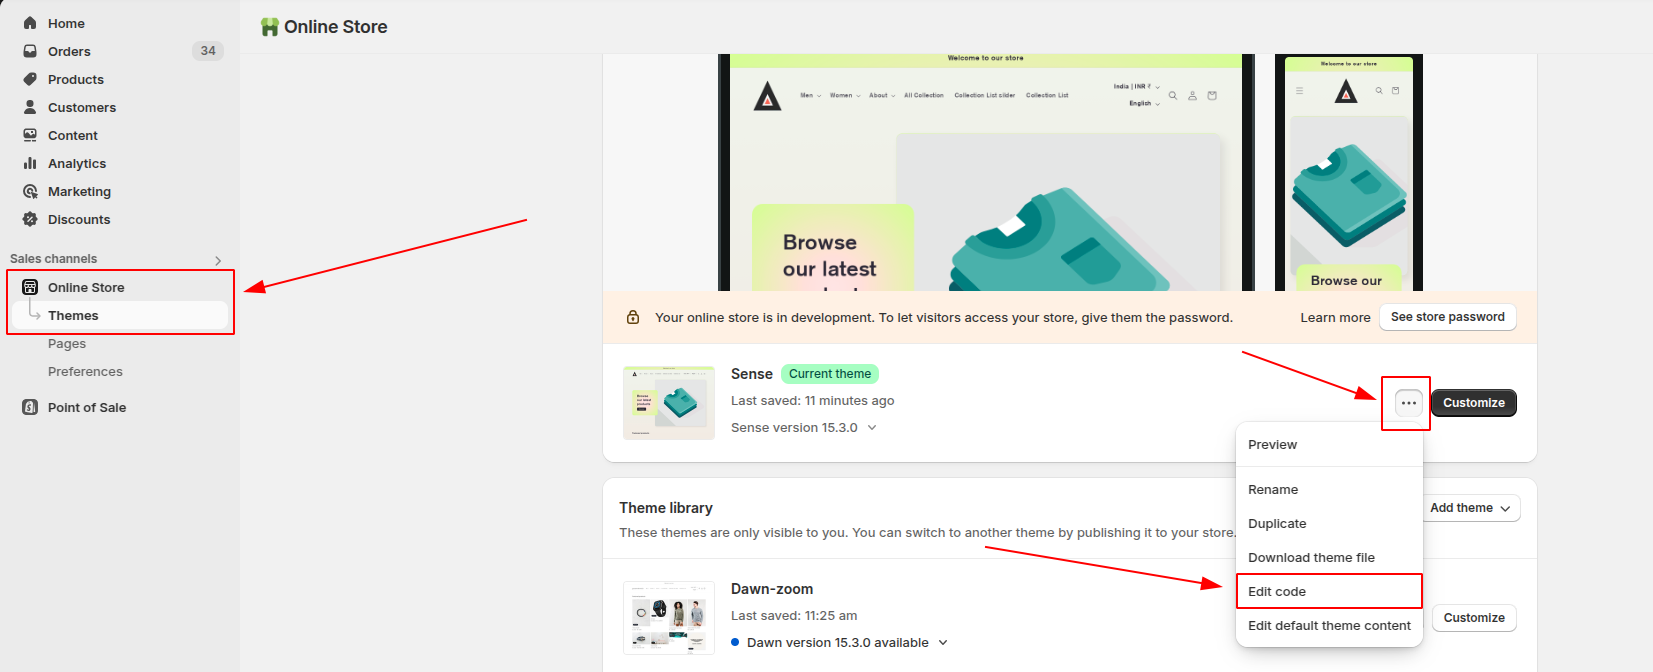
Open the Assets folder and find/create a CSS file (e.g., theme.css or custom.css).Add the following @font-face rule, replacing FONT_URL with the file URL
@font-face {
  font-family: 'YourCustomFont';
  src: url('FONT_URL') format('woff2');
  font-weight: normal;
  font-style: normal;
}

body {
  font-family: 'YourCustomFont', sans-serif;
}
Step 3: Save and Preview
Save your changes and preview the store to verify that the font is displayed correctly. Test it across different devices and browsers for compatibility.
Add a Custom Font to the Dawn Theme
Firstly, you have to upload font files to Content > Files for the Dawn Theme.
Then modify the CSS file, go to Online Store > Themes > (…)Three dots > Edit code.
Locate base.css or theme.css in the Assets folder.
Add the @font-face rule to CSS
To apply font, use Dawn’s modular structure to target specific sections.
For example, to apply the font to headings:
.h1, .h2, .h3    {
font-family: 'YourFontName', sans-serif;
}
Replace ‘Your Font Name’ with the actual name of the font you chose.
How to Add Google Fonts to a Shopify theme?
To add a new font to the Shopify theme, first, you need to select a font from Google Fonts.
Click Select this style > View selected families. Then copy the <link> code of the chosen font.
In the Shopify admin, go to Online Store > Themes > (…)Three dots > Edit code
Open the layout folder > theme.liquid file and paste the link inside the <head> tag.
Now, open base.css or theme.css in the Assets folder and add a CSS rule defining the new font family.
Adding fonts is a simple task that comes with branding benefits. If you are not sure about doing it yourself, let our Shopify developer manage this task for you.
