Running flash sales and want to promote limited-time deals? Countdown timer in Shopify can be an excellent option.
The Shopify timer bar can help you create a fear of missing out (FOMO) effect amongst the visitors. And promote the deals to drive more sales. In this tutorial, we’ll discover the Shopify Countdown timer and learn how to add it.
Let’s get started with the complete guide on how to add Shopify countdown timer.
What is a Shopify Countdown Timer?
Shopify countdown timer is a clock displayed as a popup or banner on the website that encourages visitors to take action before time runs out. It is used as a marketing tactic to promote limited-time offers like discounts during a sale.
Here is an example of a Shopify countdown sales timer:

Generally, the Shopify countdown timer bar contains a message with a call to action button.
Benefits of Using Shopify Countdown Banner Timer
The benefits of adding a countdown timer Shopify can not be ignored. It helps the merchants in a number of ways. Here’s how you can benefit from adding Shopify Sales Timer to your store:
- Create FOMO: You can add countdown timer to Shopify to create a sense of urgency by promoting limited-time deals and offers.
- Increase conversion rate: Shopify countdown timer app helps you increase the e-commerce conversion rate by encouraging the visitors to take actions.
- Drive more sales: Countdown timer on Shopify is a good way to promote the seasonal and limit-time sales and generate more revenue.
Overall, using a countdown timer for Shopify is a great way to increase conversion rates and boost revenue by creating a FOMO.
Methods to Add a Countdown Timer to Shopify
There are multiple ways to add a countdown timer bar to Shopify. The approach varies from store-to-store. Here are the most common ways add sales countdown bar in Shopify:
- Use Shopify App: You can simply use a Shopify app for Countdown timer. For e.g., apps like Meetanshi Countdown Timer Bar helps you quickly add a timer bar in Shopify with plenty of pre-defined templates. It is the quickest and easiest method.
- Code Manually: This method is a bit difficult and risky, but allows you to add Shopify countdown timer free.
Another possible way on how to add countdown timer to Shopify is using landing page builders. Many landing page builders allow adding sales timer bars on pages. If you’re using one, check it’s features.
How to Add Shopify Countdown Timer Using App?
There are many Shopify countdown timer apps available in the official app store. Our recommendation is to go with the Meetanshi countdown timer for Shopify. Strongly, it is the best countdown app for Shopify that is easy to use, offers preset templates, and can be set up in less than 5 minutes.
To get started, install the Meetanshi Countdown Timer app in your Shopify store.

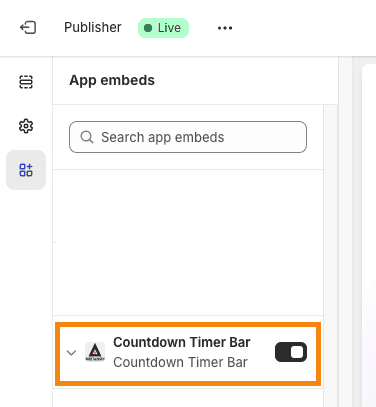
Once the countdown Shopify app is installed, go to Theme Settings > App Embeds and enable the Shopify countdown timer app. (You can also find the direct link to this section from the app dashboard.)
And “Save” settings.
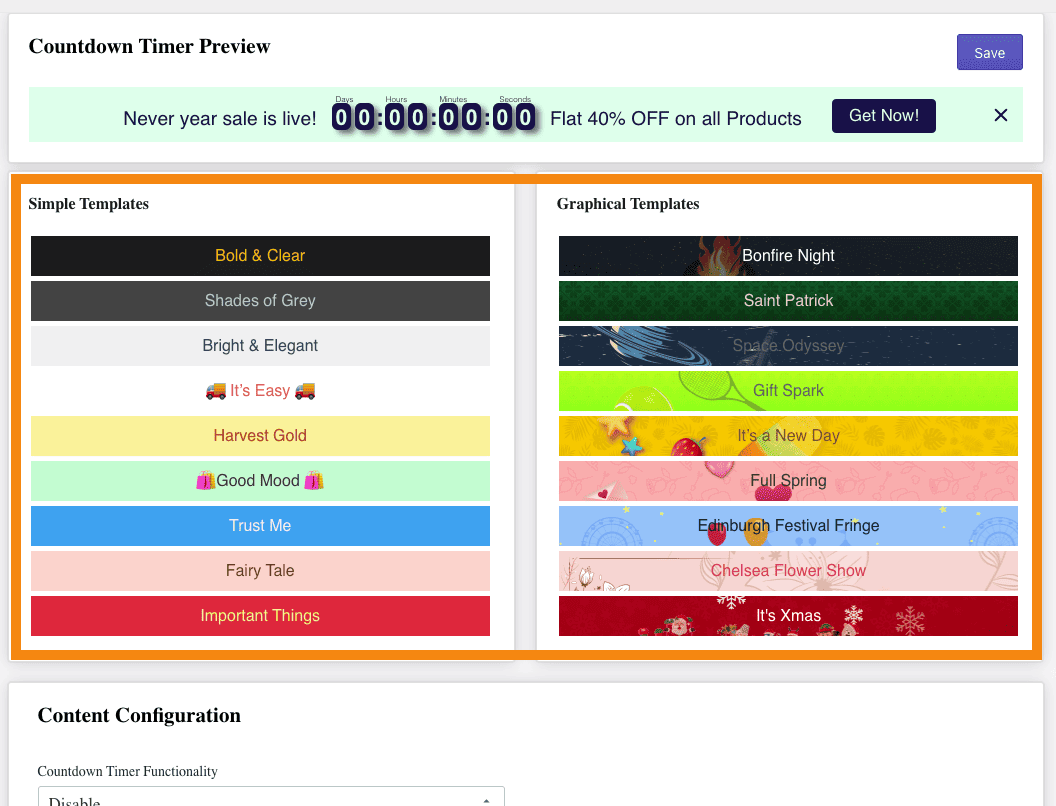
Now, navigate to Meetanshi Countdown Timer Bar > Settings, where you can enable the Shopify sales timer, choose template, and customize it.
Start by choosing any of the simple or graphical templates in the countdown timer app Shopify. You’ll also get a live preview of the timer bar as you customize it.
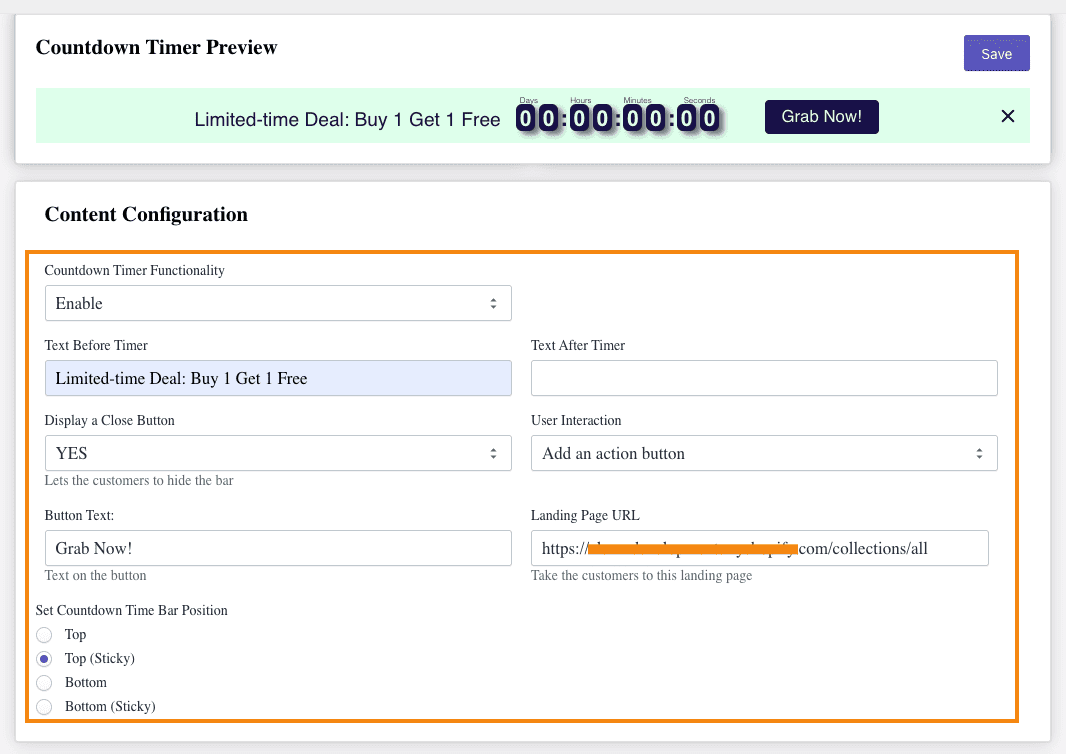
Now, scroll down to the Content Configuration section. Here, you can customize the look and feel of the Shopify countdown timer using the following settings:
- Enable or disable the Shopify countdown timer bar
- Customize the countdown timer bar & button text
- Show the close button to close Shopify countdown timer
- Configure the user interaction settings with the timer bar
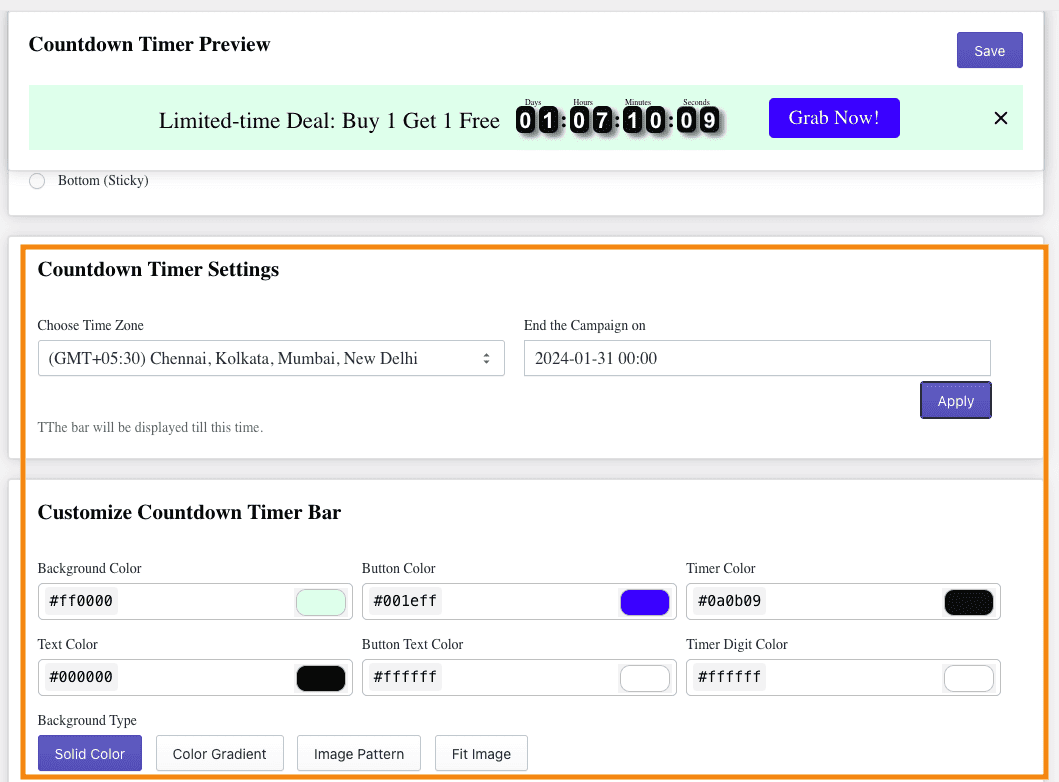
Now, scroll down and set time and date for the Shopify app countdown timer.
You can also customize the colors for the background, text, and buttons and choose from various background types.
Finally, set the page and device targeting settings. (You can choose the pages and target devices to display the timer bar.)

Click “Save” to activate the Shopify countdown timer bar.
The Shopify countdown timer bar will be displayed on the frontend as configured. That’s how easy it is to add a countdown timer to Shopify!

Create a sense of urgency for every offer using a countdown timer — easily customization, no coding.
Add Now
How to Add a Countdown Timer to Shopify Manually Using Code?
In the manual coding method, you need to create a Shopify countdown timer code snippet. And then call it in the theme.liquid file. You can also declare settings schema for ease of customization. This is an ideal method to add a free countdown timer Shopify.
Here’s how you can add countdown timer Shopify code.
In the Shopify admin, go to Sales Channels > Online Store > Themes
Click the three dots beside the “Customize” button and select “Edit code” from the dropdown menu.

Now, the Shopify theme editor will open.
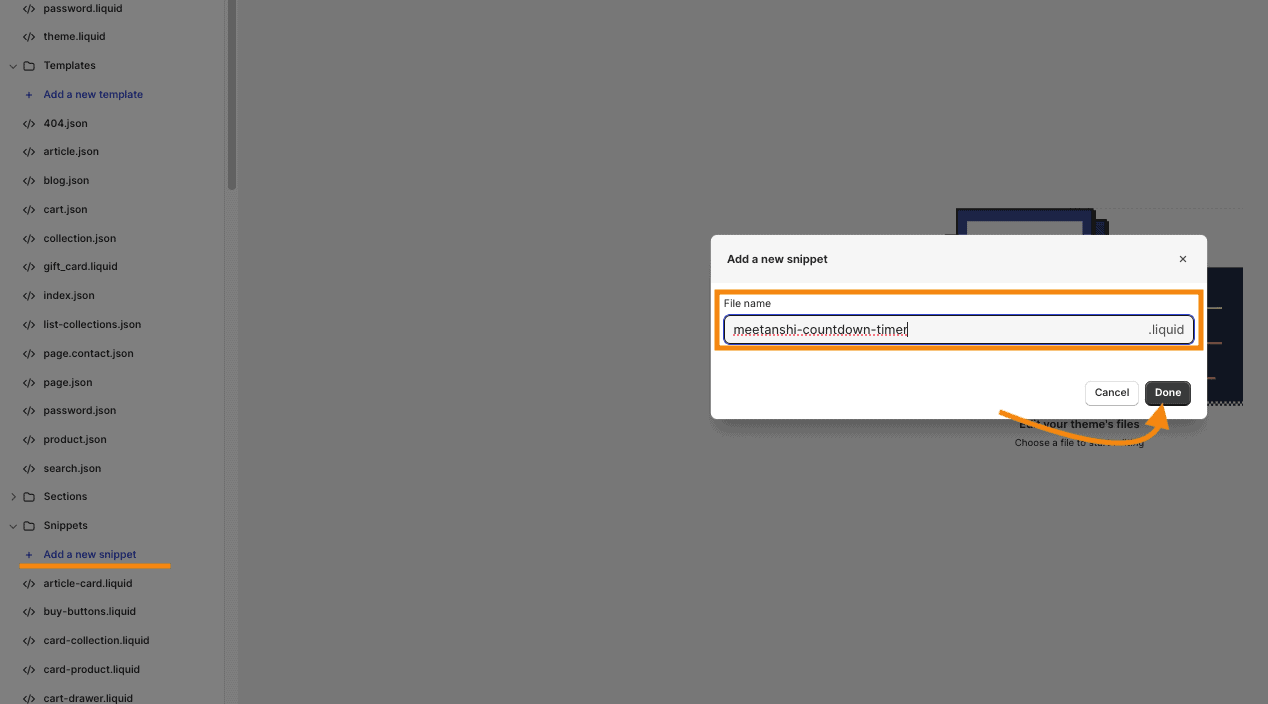
In the left menu, navigate to Snippets and click “Add a new snippet.”
Enter meetanshi-countdown-timer as the filename and click “Save.”
✕
{{ settings.countdown_text }}
Days
Hours
Minutes
Seconds
{% if settings.countdown_button_label != blank %} {{ settings.countdown_button_label }} {% endif %}
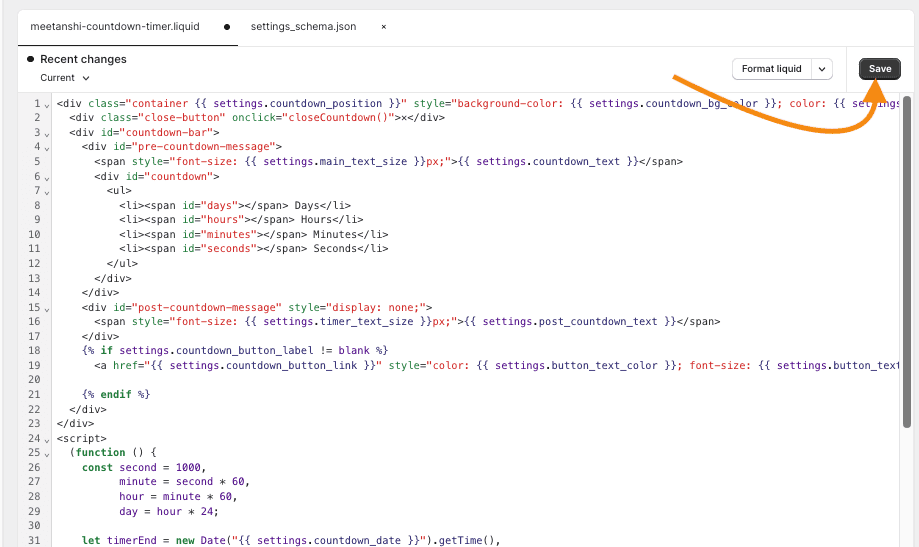
Now, copy the following countdown timer liquid snippet code:
<style>
  .container {
    text-align: center;
    padding: 10px;
    position: fixed;
    width: 100%;
    z-index: 999;
  }

  .close-button {
  position: absolute;
  top: 10px;
  right: 10px;
  cursor: pointer;
  color: #ffffff;
  width: 30px;
  height: 30px;
  font-weight: bold;
  text-align: center;
  line-height: 30px;
}

  .container.top {
    top: 0;
  }
  .container.bottom {
    bottom: 0;
  }
  #countdown-bar {
    display: flex;
    align-items: center;
    justify-content: space-around;
  }
  #countdown ul {
    list-style-type: none;
    padding: 0;
    margin: 0;
  }
  #countdown ul li {
    display: inline-block;
    text-align: center;
    background-color: {{ settings.countdown_bg_color }};
    padding: 5px; /* Adjust the padding as needed */
    border-radius: 5px; /* Optionally, add some border radius for styling */
  }
  #countdown ul li span {
    display: block;
    font-size: {{ settings.timer_text_size }}px; /* Control timer text size */
    color: {{ settings.countdown_text_color }};
  }
  span {
    font-size: {{ settings.main_text_size }}px; /* Control main text size */
  }
  a {
    color: {{ settings.button_text_color }}; /* Control button text color */
    padding: 10px 20px;
    text-decoration: none;
    font-size: {{ settings.button_text_size }}px; /* Control button text size */
    display: inline-block;
  }
</style>
And paste it into the newly created snippet file.
Then click “Save.”
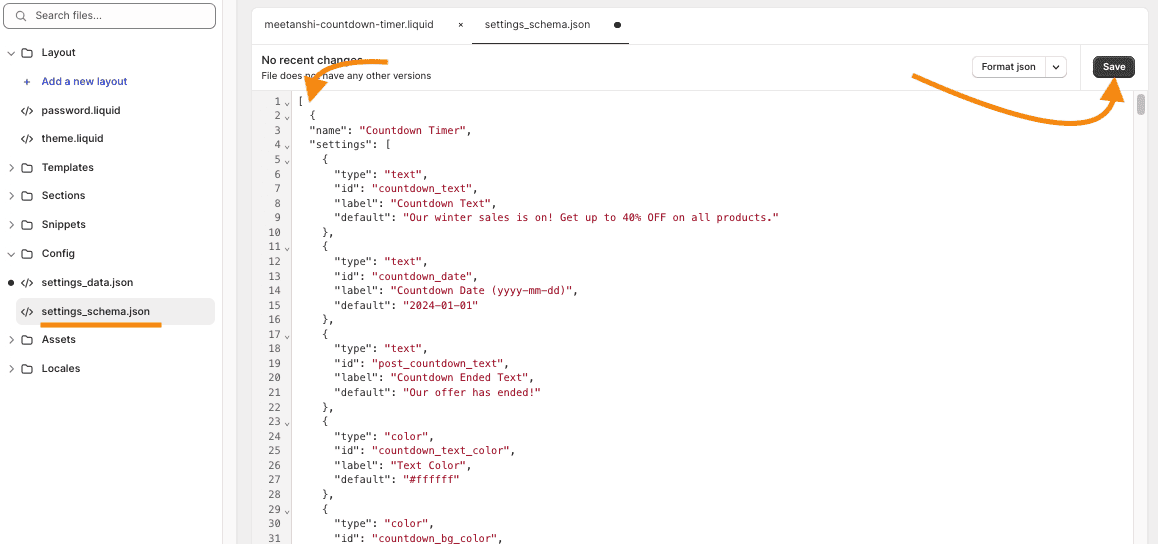
Now, open the settings_schema.json file under the Config folder.
Copy the following code:
{
  "name": "Countdown Timer",
  "settings": [
    {
      "type": "text",
      "id": "countdown_text",
      "label": "Countdown Text",
      "default": "Our winter sales is on! Get up to 40% OFF on all products."
    },
    {
      "type": "text",
      "id": "countdown_date",
      "label": "Countdown Date (yyyy-mm-dd)",
      "default": "2024-01-01"
    },
    {
      "type": "text",
      "id": "post_countdown_text",
      "label": "Countdown Ended Text",
      "default": "Our offer has ended!"
    },
    {
      "type": "color",
      "id": "countdown_text_color",
      "label": "Text Color",
      "default": "#ffffff"
    },
    {
      "type": "color",
      "id": "countdown_bg_color",
      "label": "Background Color",
      "default": "#000000"
    },
    {
      "type": "text",
      "id": "countdown_button_label",
      "label": "Button Label",
      "default": "Explore Now!"
    },
    {
      "type": "color",
      "id": "button_text_color",
      "label": "Button Text Color",
      "default": "#ffffff"
    },
    {
      "type": "range",
      "id": "button_text_size",
      "label": "Button Text Size",
      "min": 12,
      "max": 48,
      "step": 1,
      "default": 24,
      "unit": "px"
    },
    {
      "type": "url",
      "id": "countdown_button_link",
      "label": "Button Link",
      "default": "/collections/all"
    },
    {
      "type": "color",
      "id": "countdown_button_color",
      "label": "Button Color",
      "default": "#ff0000"
    },
    {
      "type": "select",
      "id": "countdown_position",
      "label": "Position",
      "options": [
        {
          "value": "top",
          "label": "Top"
        },
        {
          "value": "bottom",
          "label": "Bottom"
        }
      ],
      "default": "top"
    },
    {
      "type": "range",
      "id": "main_text_size",
      "label": "Main Text Size (px)",
      "min": 12,
      "max": 48,
      "step": 1,
      "default": 24,
      "unit": "px"
    },
    {
      "type": "range",
      "id": "timer_text_size",
      "label": "Timer Text Size (px)",
      "min": 12,
      "max": 48,
      "step": 1,
      "default": 24,
      "unit": "px"
    }
  ]
},
And paste it after the first square bracket in the file.
Click “Save.”
To render the countdown timer bar in Shopify theme, copy the following code:
{% render 'meetanshi-countdown-timer' %}
And put it before </body> tag, as shown below.
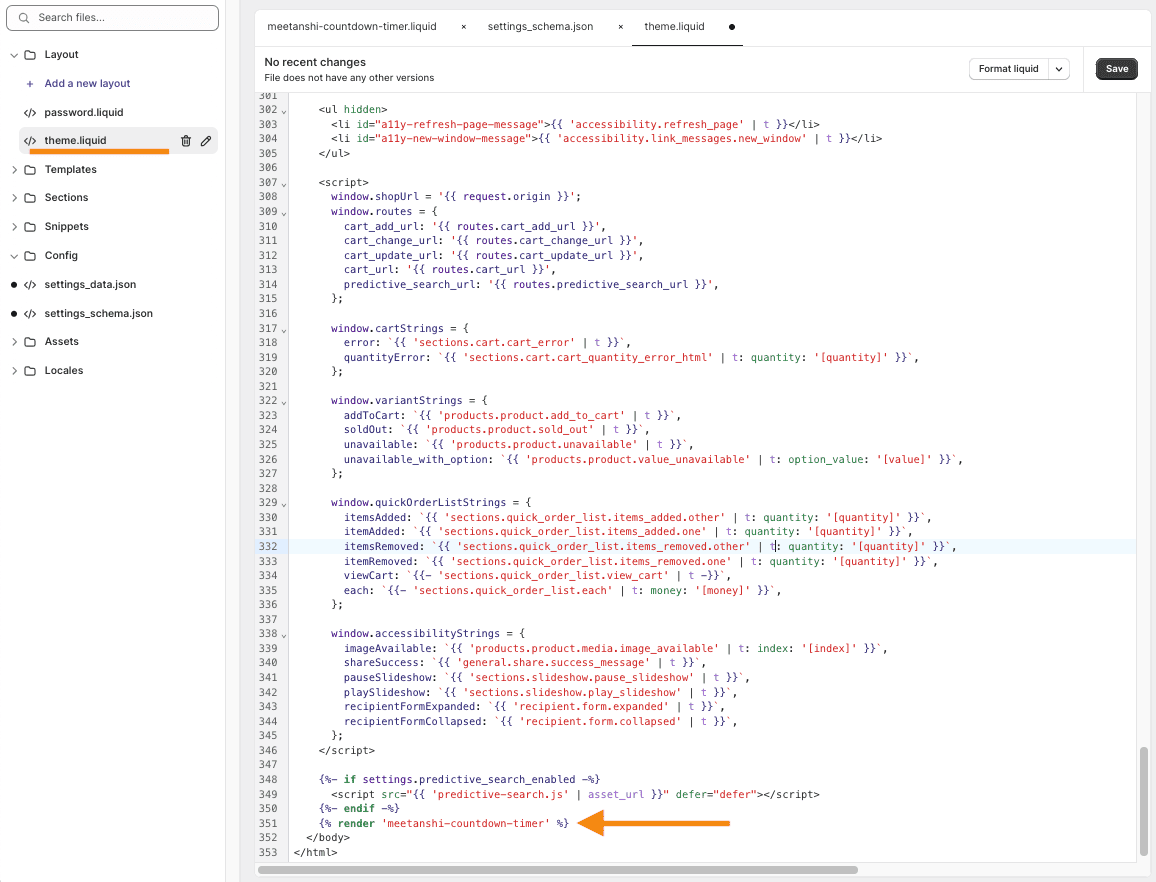
Click “Save.”
You can also place the code in the respective liquid file to add countdown timer to specific pages, for e.g. add Shopify countdown timer on password page.
Once you’re done modifying the Shopify theme code, you can customize the coutndown timer bar from the theme settings.
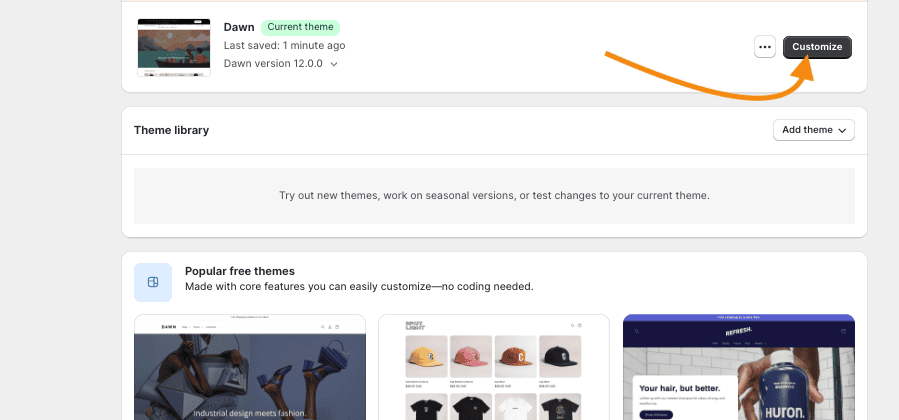
Go to Sales Channels > Online Store > Themes and click the “Customize” button.
In theme customization, move to “Theme Settings” and expand the Countdown Timer to configure the settings.
Here, you can customize how you want to display the countdown timer in Shopify. For example, you can:
- Customize the countdown timer text
- Set the date for the countdown timer
- Change colors for the text, button, and background
- Change sizes of text
- Set destination URL for the CTA button
- Position the countdown timer to top or bottom of the page

Once you’re done customizing countdown timer in Shopify theme settings, click “Save.”
It will add countdown timer to Shopify store, which will look like this:

Now, that’s really impressive and quick!
Win Conversions with Shopify Countdown Sales Timer
Leverage the methods provided above to add a countdown timer to Shopify. You can either go with the quick app way or do manual coding, depending on your expertise. But we recommend you to try the Meetanshi Shopify Countdown Timer app. It offers advanced customization options like button animations, graphical backgrounds, and page targeting to create compelling and successful countdown timer bars.
