An About Us section can turn visitors into loyal customers by showcasing your brand values and journey. If you’re wondering how to add an About Us section in Shopify, there are simple ways to do it, either with code or using an app. Let’s explore both.
Add a Ready-to-Use About Us Section
Here, we will use MIT Sections Pro to add a beautifully crafted about us section. It offers numerous customization features, more than 8 styles of sections, a code-free environment, and so much more, all within minimal cost.
This is an example of one of the sections; you can design it however you want.

Below is the simple process to use the app.
Step 1: Find Your Desired Section
Install the MIT Sections Pro (free) from the Shopify App Store, then from the app dashboard, click Browse sections and search for the About us section.
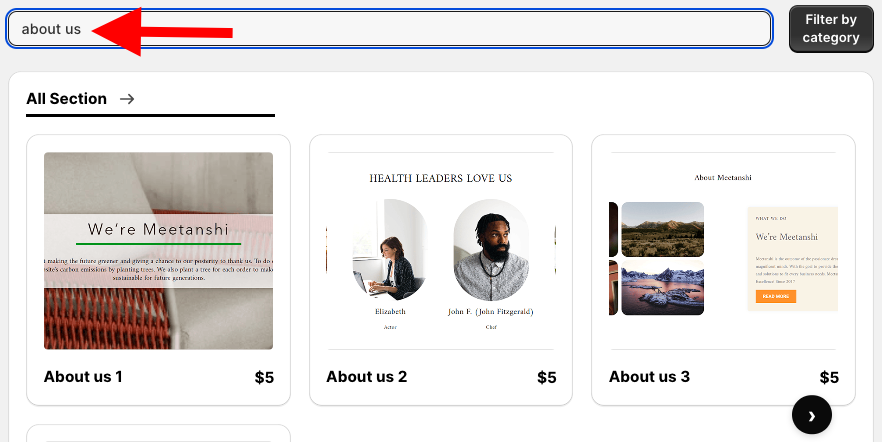
Here we will select the About us 1; you can choose the one that fits your brand.
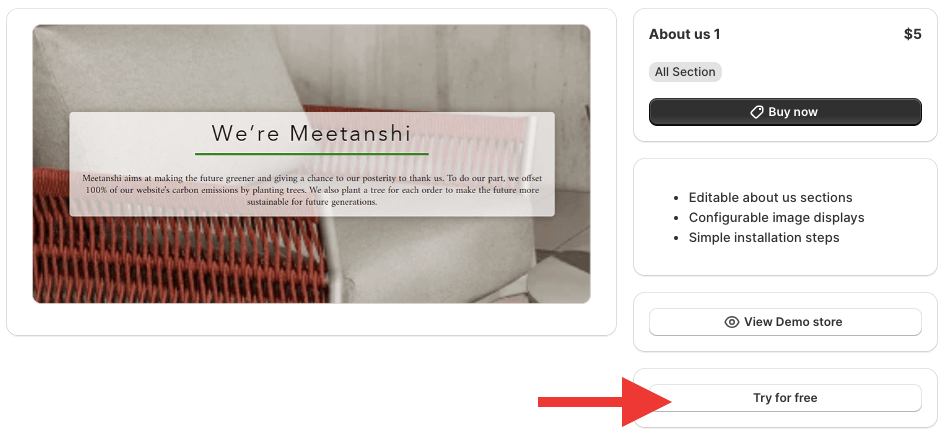
Step 2: Click on the “Try for free” Button
Click Try for free to get a no-cost trial and check the preview, features, etc. of the section.
While on the free trial, you will be redirected to the MIT demo store. Once you purchase the section, you can add it to your Shopify theme.
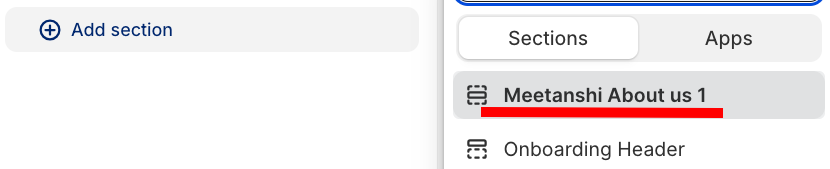
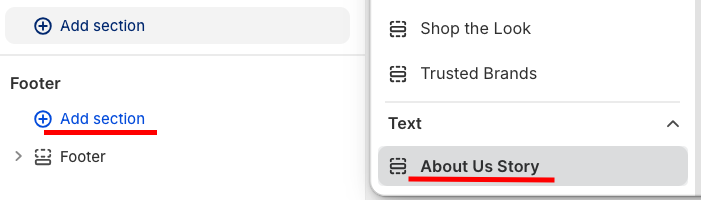
From here, click the Add section and select Meetanshi about us 1.
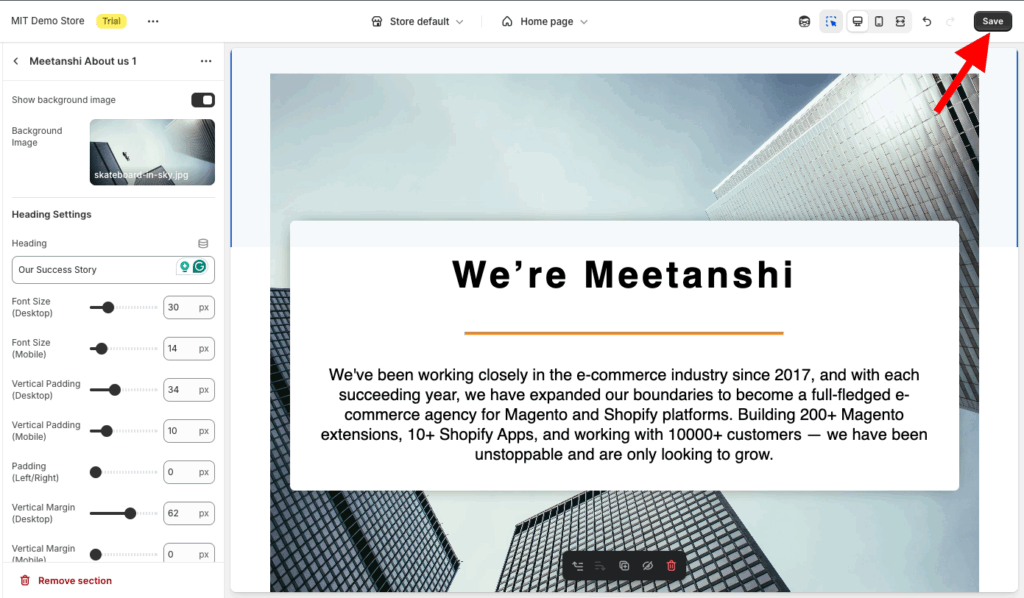
Step 3: Modify the About Us Section
Click Meetanshi about us 1 to explore the customization features, it offers more than 40 options to change as per your liking.

After editing the section, save it.
Once your About Us section is live, you can also add a mega menu to Shopify and improve navigation for your customers to make browsing seamless.
Add a Shopify About Us Section Via Liquid Code
The following are the steps to create an About Us section using custom code.
Step 1: Create a New Section
Navigate to your Shopify admin panel, click Online store > Themes > …(three dots) > Edit code.
In the sections folder, add a new section and save it as about-us-section.liquid.

Step 2: Paste the Liquid Code
Then copy the code from here and paste it into the newly created about-us-section.liquid file and save it.
{% style %}
  .section-{{ section.id }} {
    background-color: {{ section.settings.background_color }};
  }
  .richtext-content p {
    margin-bottom: 1rem;
    line-height: 1.6;
  }
{% endstyle %}

<div class="section-{{ section.id }} py-16 sm:py-24">
  <div class="container mx-auto px-4 max-w-7xl">

    {% comment %} Check layout setting to determine image and text order {% endcomment %}
    {% assign image_order = 'lg:order-1' %}
    {% assign text_order = 'lg:order-2' %}
    {% if section.settings.layout == 'image_right' %}
      {% assign image_order = 'lg:order-2' %}
      {% assign text_order = 'lg:order-1' %}
    {% endif %}

    <div class="lg:grid lg:grid-cols-2 lg:gap-16 items-center">

      <!-- Text Content Column -->
      <div class="space-y-6 mb-12 lg:mb-0 {{ text_order }}">

        {% if section.settings.title != blank %}
          <h2 class="text-4xl font-extrabold tracking-tight text-gray-900 sm:text-5xl">
            {{ section.settings.title | escape }}
          </h2>
        {% endif %}

        {% if section.settings.subtitle != blank %}
          <p class="text-xl font-medium text-indigo-600">
            {{ section.settings.subtitle | escape }}
          </p>
        {% endif %}

        {% if section.settings.text_content != blank %}
          <div class="richtext-content text-gray-700 text-lg">
            {{ section.settings.text_content }}
          </div>
        {% endif %}

        {% if section.settings.button_label != blank and section.settings.button_link != blank %}
          <div class="pt-4">
            <a href="{{ section.settings.button_link }}"
               class="inline-flex items-center px-6 py-3 border border-transparent text-base font-medium rounded-full shadow-sm text-white bg-gray-800 hover:bg-indigo-700 transition duration-150 ease-in-out">
              {{ section.settings.button_label | escape }}
            </a>
          </div>
        {% endif %}
      </div>

      <!-- Image Column -->
      <div class="{{ image_order }}">
        {% if section.settings.image != blank %}
          <div class="relative overflow-hidden rounded-xl shadow-2xl transform hover:scale-[1.02] transition duration-500 ease-in-out">
            {% comment %} Renders the image responsively using best practices (image_tag with standard filters) {% endcomment %}
            {% liquid
              assign image_url = section.settings.image | image_url: width: 1024
              assign image_alt = section.settings.image.alt | default: section.settings.title
              echo image_url | image_tag: alt: image_alt, class: 'w-full h-auto object-cover', loading: 'lazy'
            %}
          </div>
        {% else %}
          {% comment %} Placeholder if no image is selected {% endcomment %}
          <div class="bg-gray-200 h-96 w-full rounded-xl flex items-center justify-center text-gray-500 border-2 border-dashed border-gray-400">
            <span class="text-lg">Add your About Us image here (600x600 recommended)</span>
          </div>
        {% endif %}
      </div>

    </div>
  </div>
</div>

{% schema %}
{
  "name": "About Us Story",
  "tag": "section",
  "class": "section-about-us",
  "settings": [
    {
      "type": "header",
      "content": "Layout and Style"
    },
    {
      "type": "color",
      "id": "background_color",
      "label": "Background Color",
      "default": "#f9fafb"
    },
    {
      "type": "select",
      "id": "layout",
      "label": "Layout",
      "options": [
        {
          "value": "image_left",
          "label": "Image on Left"
        },
        {
          "value": "image_right",
          "label": "Image on Right"
        }
      ],
      "default": "image_left"
    },
    {
      "type": "header",
      "content": "Content"
    },
    {
      "type": "text",
      "id": "title",
      "label": "Main Heading",
      "default": "Our Story & Mission"
    },
    {
      "type": "text",
      "id": "subtitle",
      "label": "Subheading",
      "default": "Crafting quality goods since 2020."
    },
    {
      "type": "richtext",
      "id": "text_content",
      "label": "Body Content",
      "default": "<p>Write your detailed brand history, values, and vision here. Use this space to connect with your audience on a personal level, highlighting what makes your brand unique and trustworthy.</p>"
    },
    {
      "type": "image_picker",
      "id": "image",
      "label": "Featured Image"
    },
    {
      "type": "text",
      "id": "button_label",
      "label": "Button Label",
      "default": "Visit Our Team Page"
    },
    {
      "type": "url",
      "id": "button_link",
      "label": "Button Link"
    }
  ],
  "presets": [
    {
      "name": "About Us Story",
      "category": "Text"
    }
  ]
}
{% endschema %}

<script src="https://cdn.tailwindcss.com"></script>
<script>
  // Ensure Tailwind is configured if needed (e.g., for custom colors not used here)
  tailwind.config = {
    theme: {
      extend: {
        fontFamily: {
          sans: ['Inter', 'sans-serif'],
        }
      }
    }
  }
</script>
<style>
    /* Load Inter font for aesthetics */
    @import url('https://fonts.googleapis.com/css2?family=Inter:wght@400;600;700;800;900&display=swap');

    /* Ensure all elements use the Inter font */
    body * {
        font-family: 'Inter', sans-serif !important;
    }
</style>
Step 3: Preview the Section in the Frontend
Head back to the Shopify admin panel, Online store > Themes > Customize.
From the theme editor’s left sidebar, click the Add section and select About Us Story.
Click About Us Story to expand the customization features, make changes as you want, and save them.
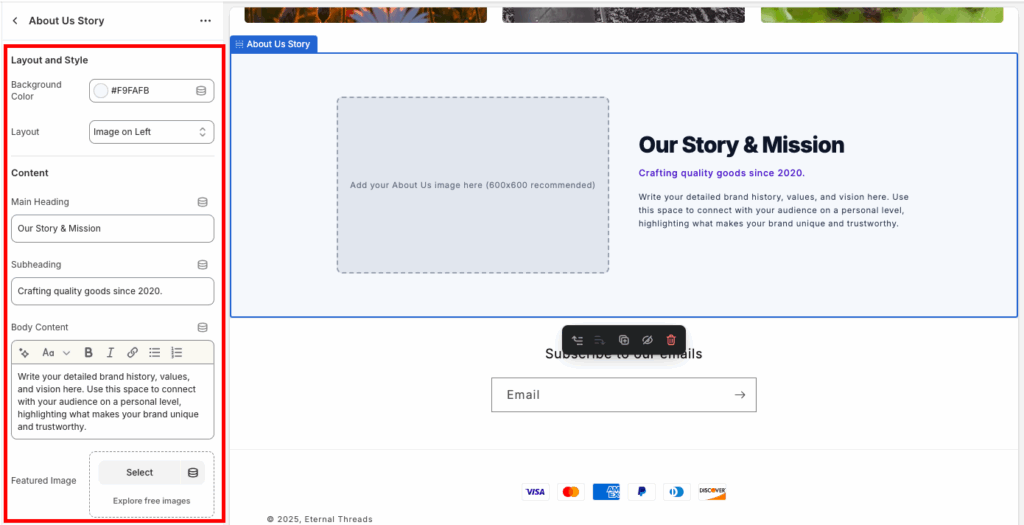
This is how it will look in the frontend (minimal & simple).

Why Go with a Shopify App?
MIT Sections Pro hooks you up with a super customizable About Us section. You can totally design and tweak templates to perfectly fit your brand, and even with the free template, you’re in full control.
The app packs over 130 free and paid sections, like cool banners, testimonials, and FAQs. This means you can build a fabulous Shopify store without needing any coding skills.
Along with these features:
- There’s an extra About Us template with even more customization options
- No cost to install, so everyone can get those advanced customization options.
- Seriously, put sections together effortlessly anytime, anywhere, with super easy-to-use functions.
- It works nicely with all Shopify themes and is optimized for quick page speeds for a smooth experience.
- Get full control over editing your sections, even with the free template.
- Easily add or swap out sections as your store grows, so you’re never stuck with the same old layout.
- Affordable pricing plans for all business sizes (small, medium, large), plus a free trial to make sure it’s a perfect fit before you commit.
Your all-in-one solution to create a professional Shopify store
Install App Now